1 - Basic configuration
2026-10-27
This article is the first in a serie, in which I'll describe my setup for working with real-world instruments and a computer running GNU/Linux.
The main questions will be:
- What am I able to do?
- How much specific hardware/software do I use and how expensive?
- How hard is it?
1. Hardware considerations
You need to bring the sound from the instrument through our effects and audio processing and to the speakers or any other output. And maybe record it to the hard drive while doing so.
The problem you will face is: how could you do that in realtime? Because you don't want to have 2 seconds between the moment you pluck the string and the one the sound is projected in the room. This time is called latency and we will discuss it further down this article, as too much latency makes it impossible to work. But you don't need that much of hardware to get around this issue.
Hardware-wise, you need a rather basic computer. My main rig is an Intel Xeon at roughly 3GHz. But I regularly use a Lenovo Thinkpad X260 with a cheap i3.
Most important is your audio interface. That's another name for the dedicated soundcard you will need. You might say your computer has an audio interface, but you do want a dedicated one for the latency issues we've just discussed.
I use USB interfaces for the practicality, for cost reasons and for their availability. And also because, so far, it has worked well.
In my experience, start with what you have or take a basic audio interface: choose the number of inputs you need and you are good to go. You don't need anything fancy.
2. Software considerations
2.1. Linux distribution
Distribution is the name of the flavor of your Linux treat. For more detail about the Linux lingo and ecosystem, feel free to check online.
In two words, you want a computer running Linux for at least these 4 reasons:
- absence of bloatware
- Linux is way less greedy on hardware ressources. So you'll do more with less hardware. You're welcome.
- amazing stability
- the JACK audio software (see below)
I use Debian based distributions as they're what I am the most familiar with. I've tried generic distributions (Debian, MXLinux, Ubuntu) and specific-purpose distributions (Ubuntu Studio, AVLinux) and to me, they are not that different.
The latter group might give you more preinstalled softwares and sometimes a configuration interface but they might take decisions for you. You might start with them and then move to generic one that might be easier to customize.
Mainstream distributions (debian-based) https://ubuntu.com/download https://www.debian.org/distrib/ https://mxlinux.org/
Specific, audio production oriented distributions https://ubuntustudio.org/ https://www.bandshed.net/avlinux/
Refer to each distribution's documentation for insights on the installation process. You might find on the Internet that you'd need a realtime kernel. In my experience, you don't. But do as you please.
You would need a basic understanding of GNU/Linux to operate, but not much. You will mostly find software or plugins through:
- official repositories
- audio-dedicated/specific repositories (kxstudio, but dead at the time of writing)
- Appimages which are autonomously executable
- plugins as VST/LV2, etc. (see next article)
You will obviously need amp simulators, effect processors, a Digital audio workstation and a few other things we will describe in later articles. By now we'll focus on the main software you'll need.
2.2. JACK Audio
JACK is
"a professional sound server API and pair of daemon implementations to provide real-time, low-latency connections for both audio and MIDI data between applications." (official website)
JACK is stable, easy to install, easy to configure, easy to use. It allows you to let the sound flow in realtime and to control this flow. It is the heart of your system, software-wise. It allows you to process the sound in realtime.
One alternative to JACK Audio is Pipewire. In my experience it is not as practical and stable yet. Obviously, feel free to experiment.
You might install JACK through the official repositories of your distribution. If you have an audio-production specific distribution, it might already be installed.
You can control JACK through a few graphical user-interfaces, of which they are:
Let's see how to configure your audio interface with one of these softwares, namely QjackCtl.
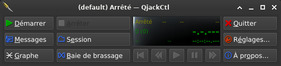
2.2. JACK configuration
First, choose your interface in one of these drop-down menus.
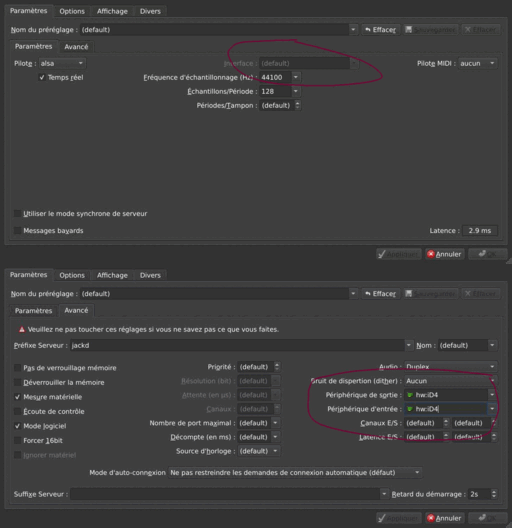
Then, you have two main parameters to adjust: sample rate and buffer size. These two parameters will affect the latency, i.e. the time your processed sound takes to go from your instrument to your ear, through your computer.
Very simply put, you can think about your sample rate as the definition of the sound. The higher the rate, the better the quality of the sound will be (and the faster it will travel through). But the drawback is: the best quality you use, the more ressources it will need for your computer to process. Another point to consider is that interfaces all have a maximum bandwidth, as some plugins have. You can choose 44KHz or 48KHz and forget about it.
On the other hand, the buffer size is the amount of audio data your system will process before taking another chunk of said data. The smaller the amount is, the faster it will process your sound (you're starting to get it: you would then have less latency). But the more workload it will require for your hardware.
And what happens if your computer cannot process the sound quickly enough? You'll hear stutter, you'll lose audio data during the process. It's called XRuns and you will surely hate them. You don't want any XRUNS when you're either recording or broadcasting.
So, you will have to make compromises, as in everyday life. You will want as less latency as possible (measured in milliseconds or ms) without having a degraded sound or XRUNS.
When you're getting close to 10ms, you'll hear a delay between the production and the rendition of sound and you'll hate it, maybe even more than the XRUNS. You don't want to work this way.
My setup is: Sample rate : 48KHz Buffer size : 128
And this gives me roughly 2.7ms latency. It's really good.
One last think to think about: the effects you'll use might affect the latency but that won't show in your JACK interface, don't let yourself get caught off by that.
2.3. Internal wiring
JACK audio allows you to manage the flow of your audio signal from the input of your audio interface to its output.
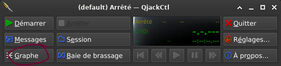
In QjackCtl, it's called "Graph" and it looks like that:
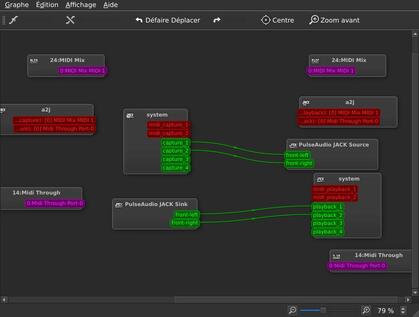
You will use it to guide your audio signal through your effects, maybe your looper, other effects, your DAW, and finally your speakers.
Softwares as QjackCtl might allow you to save this wiring. That is amazingly practical.
But you might as well use Session management softwares such as RAYSESSION. It will allow you to build an entire software setup and save it for further use. It really is a powerful tool.
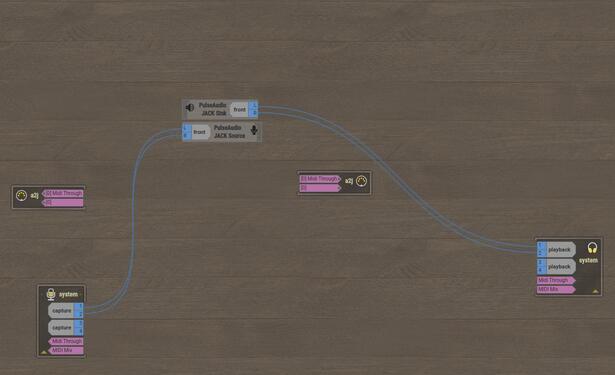
My setup is all saved inside one of these sessions and goes as follows:
  Input
    v
Jack Meter
(input volume)
    v
Audio effects
    v
Looping software
    v
Jack Meter
(main volume)
    v
   DAW
    v
  Output
Now you can launch JACK through QjackCtl and connect your input to your output. If everything is good, you might hear your instrument outputing.
That's a good first step. In a following article we will get into the subject of audio effects and amp simulators.